A couple weeks ago, I went to the overwhelmingly awesome Alameda Antique & Flea Market with my friend Mira. We picked up a few things. That shiny thing in the middle was my favorite object: an art deco chrome bread box. My idea: turn it into a home for all my electronics that need to be plugged in. You can see what a mess it is to have camera, batteries, phone, dongles, ipad all in a wreck on the counter:
So I got right to it. Firstly, I used some steel wool to rub out the spots of rust on the outside.
I was afraid that the steel wool would scratch the chrome, but it actually did really well. Here is the exact same spot on the breadbox as the picture above.
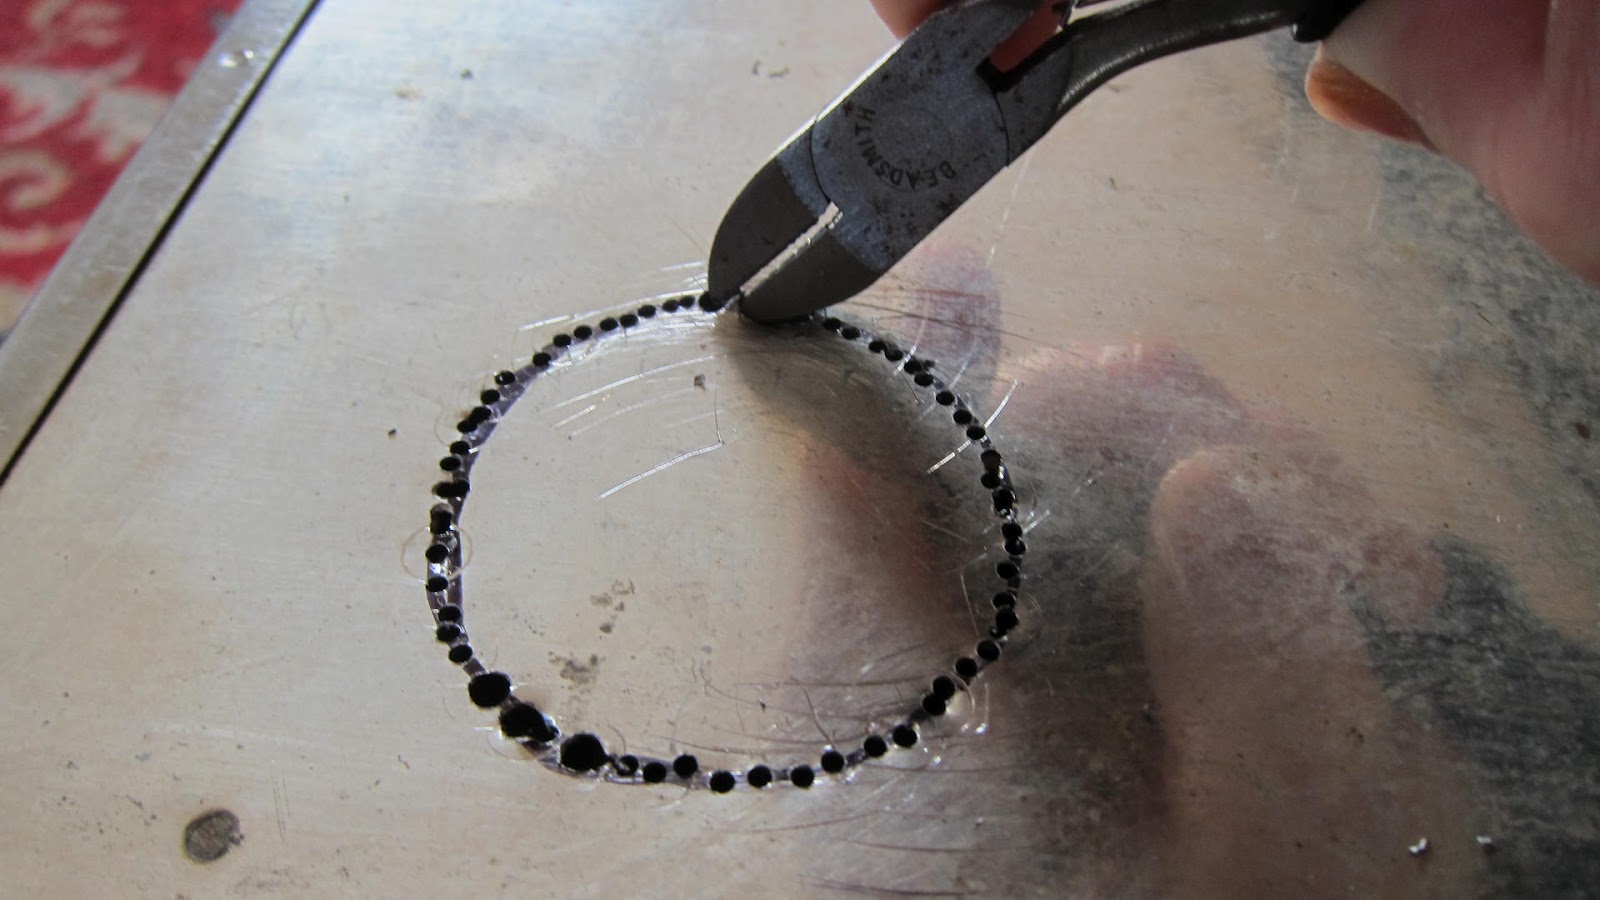
Then I had to make a hole in the back for the plug of the powerstrip to go through. This was the toughest part. I bought a special 1 1/2" drill bit, but couldn't get it to stay in one place, so I ended up tracing the drill bit and going around the circle with a tiny drill bit, one hole at a time.
At this point I hoped the large drill bit would have something for the teeth to grab on to, but it didn't. So I just continued making holes.
I couldn't get the holes quite close enough to run into one another, so I ended up snipping the metal between them with a wire cutter.

Once I got it started, I was able to use a pair of needle nose pliers to pull the circle away from the breadbox.
Then there was a super jagged edge which is less than ideal for electronics. Unfortunately the file didn't really work.

So instead I just taped the bejeezus out of it with electrical tape.
(Cat interlude. Parsnip found the hole irresistible)
Okay, next step. So it looked like this inside to begin with. I wanted it to look as nice inside as it does outside, so I added some corduroy to the horizontal surfaces with hot glue. It peels off easily if I ever want to change it out, but sticks well enough to be semi-permanent.
And for the final touch I used these very cool twisty ties to keep all the cords tidy.
And, voila!


No comments:
Post a Comment